
I do a lot of soldering and for the last few years have been using SMD components. Up until recently I was buying short pieces of tape with a few dozens or a hundred components. The amount that I do has really increased and running our of components began to irritate me so I started buying them on commercial rolls of 4,000 or 5,000 components.
The full rolls are unwieldy so what I really wanted was a cartridge that was small enough to have a bunch of them in a drawer or plastic storage box but big enough to hold a fair number of components.
So…I designed this.
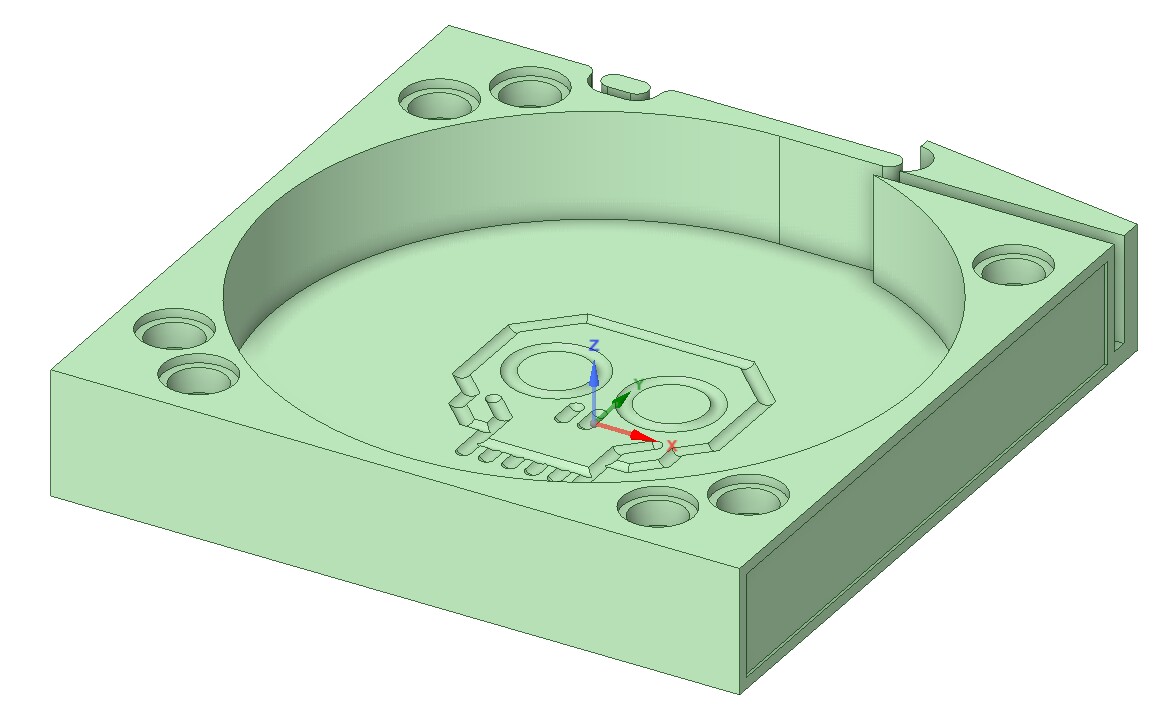
It’s 60mm x 60mm x 11mm and is designed to dispense standard 8mm x 1mm component tape. I’ve got other versions for wider and thicker tape. It will hold a good 2m or tape which is around 1,300 components. The paper tape with the components comes out the straight slot while the clear plastic cover tape turns back out of the curved slot. The little tab holds the cover tape back so it doesn’t get in your way. The splitter between the straight slot and the curved slot keeps the components from falling out until the tape emerges from the straight slot.
I think that the coolest feature of this design is the holes around the corners of the cartridge. They allow you to gang cartridges together into stacks using standard LEGO Technics connector pins. The cover also uses connector pin like projections to attach to the cartridge. With the cartridge being only 11mm thick you can’t put two pins end to end so I needed two holes so that the pins in adjacent connections can alternate which hole they use. On 16mm and wider cartridges I could have used a single hole but will keep the two holes for compatibility with the narrower cartridges.
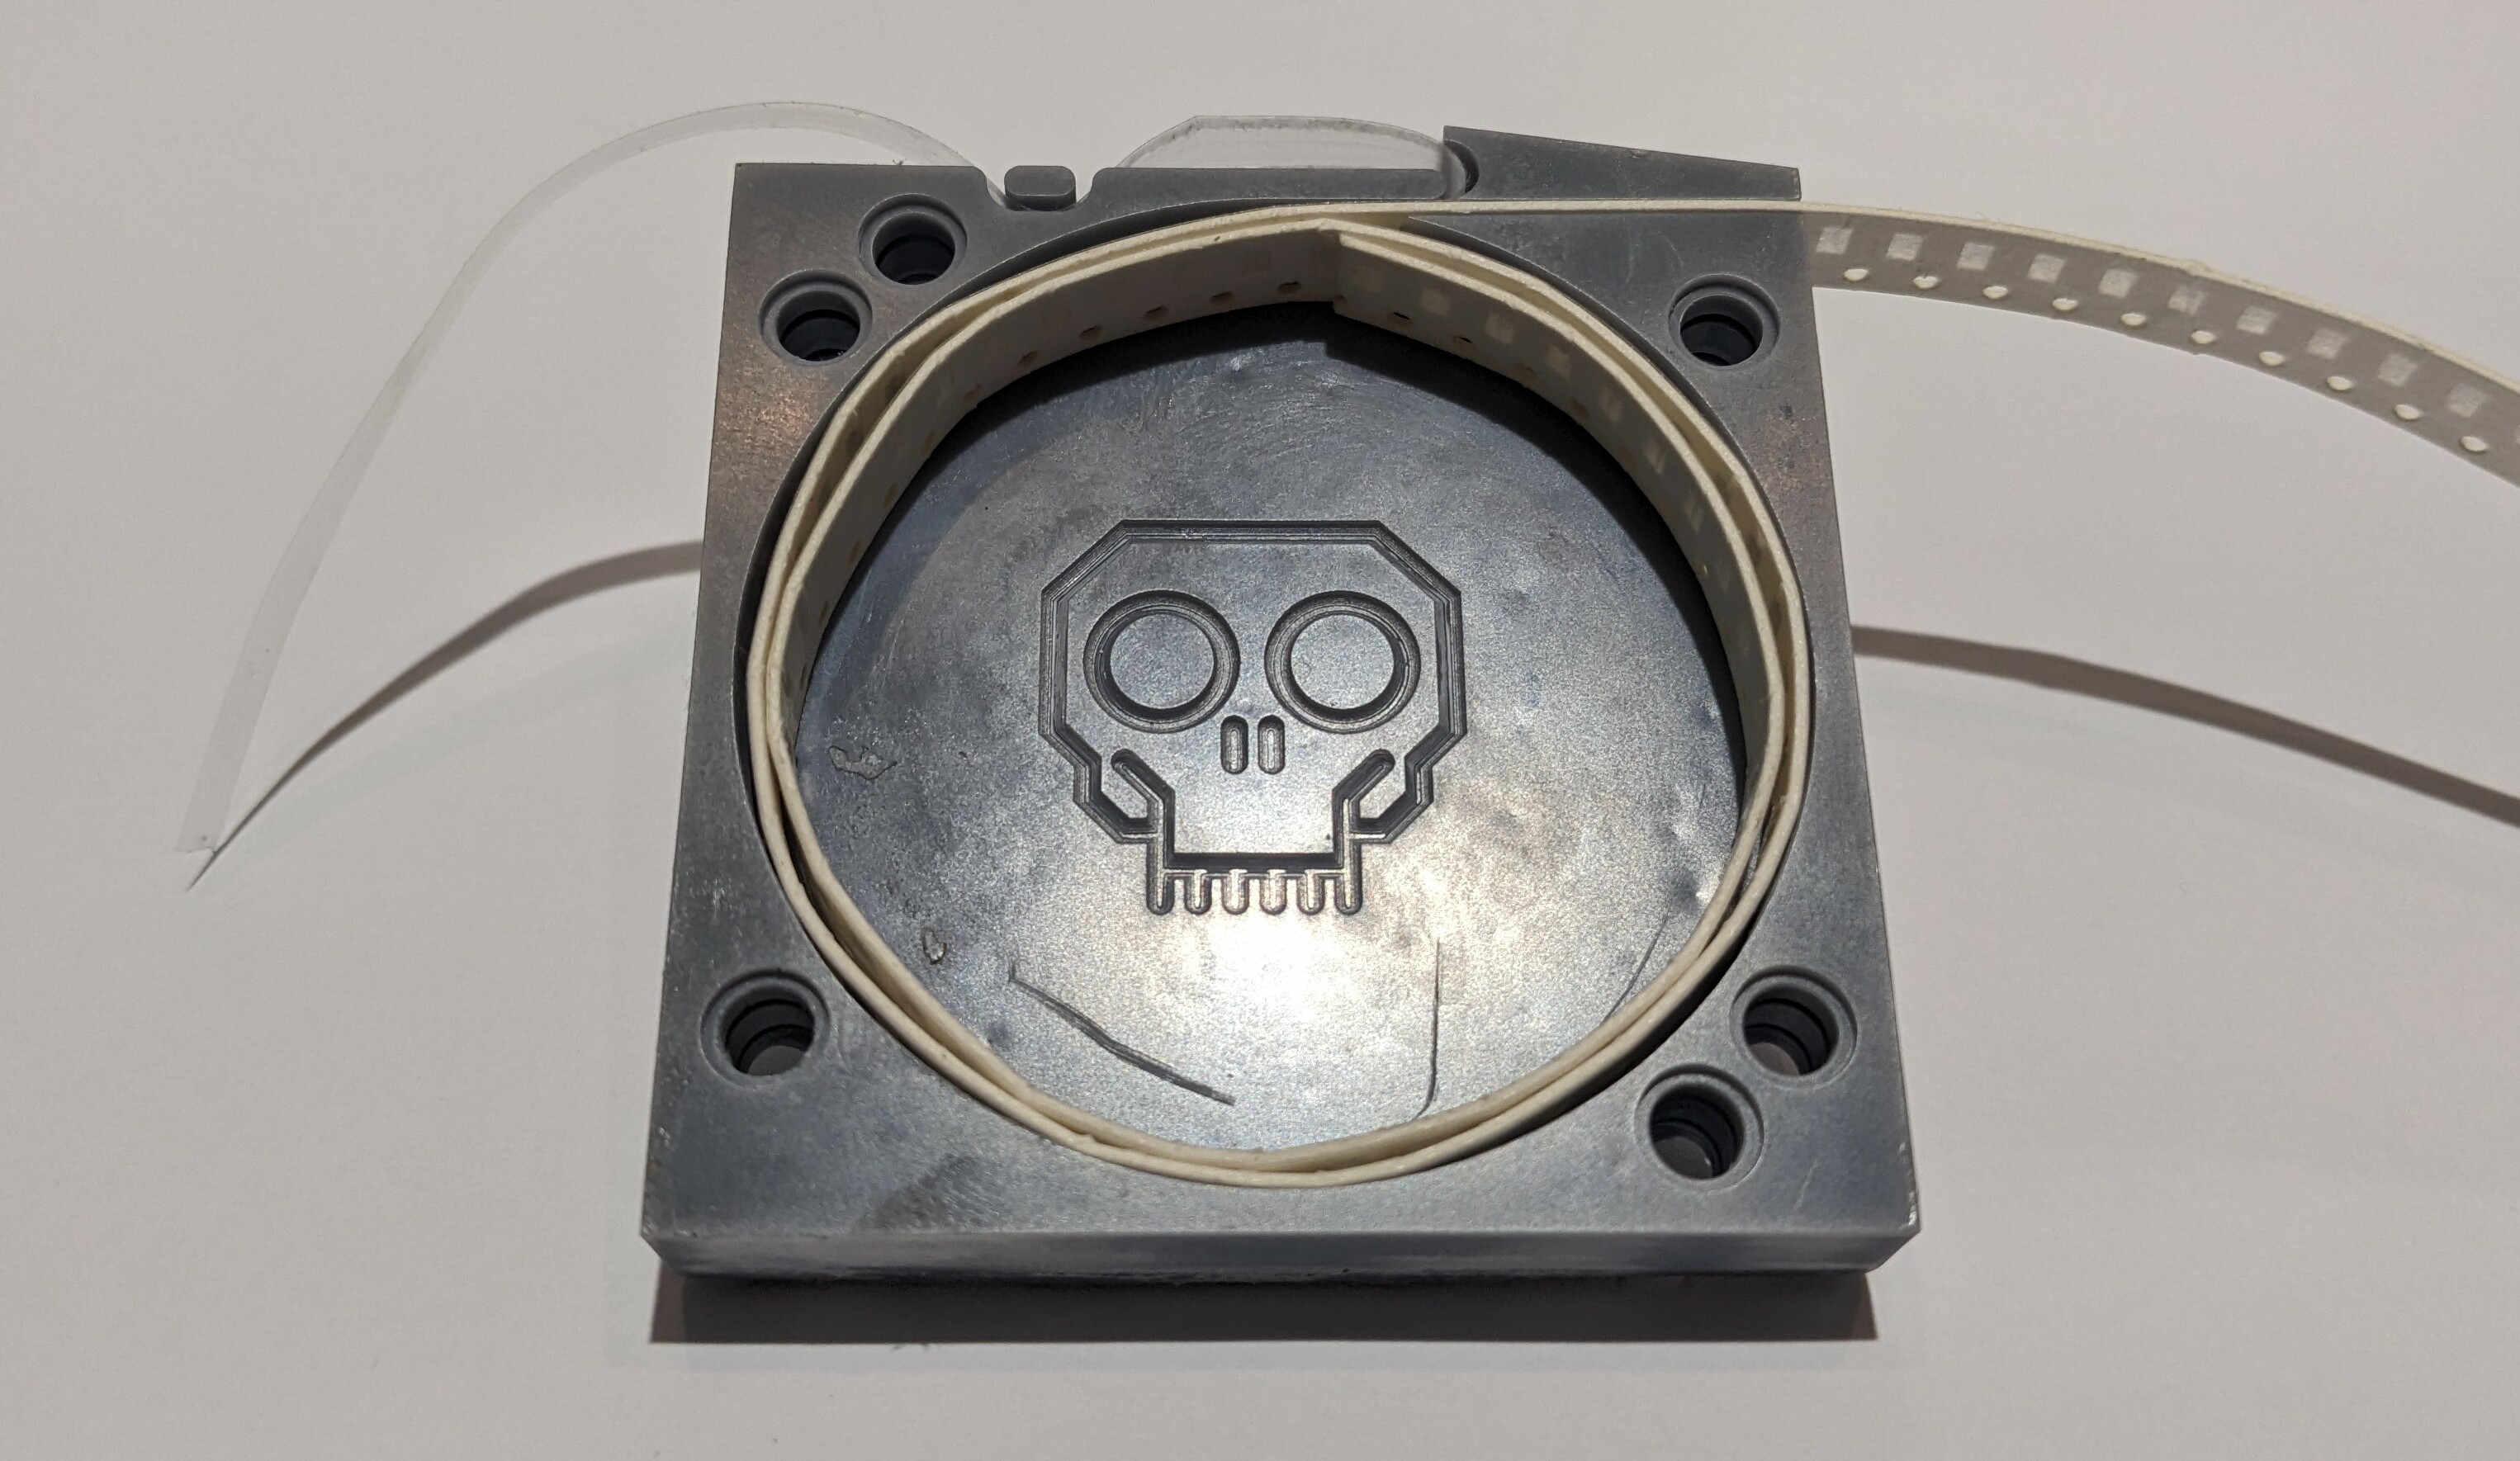
This is a rough prototype to test the fit of the tape. It seems to work quite well.
You must log in or register to comment.
This is brilliant. I do a ton of smd soldering. This would have saved me so much time. I gotta get my printer going again.
Thanks. It’s loosely based on a number of designs that I’ve seen online. I wanted to make improvements to meet my needs.
What are the improvements? It seems like just a functional switch of existing designs from magnets to a specific Lego part (I am assuming you are a Lego builder then haha) without DIN rail mounts.
I wanted something smaller than most of the designs I had seen. These are 60mm x 60mm which makes them small enough to go into the Plano parts boxes I use for storage. I also wanted them in various widths with various slot openings. I use resistors and capacitors on paper tape but I also have chips and LEDs on plastic tape which require a wider body and slot. The splitter and slot width was important because I need to be able to clip off the end of the tape and throw them in a drawer without losing parts. I wanted to avoid multi part designs with clips and springs to connect to a rail or spools to hold the tape which make the whole thing wider. The cover was important because I expect to use them individually rather than connected together. Connecting them together with the LEGO pins was a concession to the guys I work with (well, one of the guys) who tends to build a few at a time where I tend to do a lot of prototyping and repairs. The pins mean there are no clips or pins projecting from the individual cartridges.
Yes, I’ve been a LEGO builder for 50 years or so and there is lots of Technics in my office. The LEGO pins are POM and very compliant. I’ve actually considered adding a DIN mount to these using a compliant DIN latch from BUD that I can buy from Digikey or Mouser. Another thing I’ve considered is just building DIN end clips where you have one with an integrated cover and one without. You would clamp those to a DIN rail then sandwich your stack up of cartridges between them. I’m just kicking around ideas right now.
I may ultimately make up a version with a window in the little sloped part so my friend can use a pick and place pen to pick the parts up from there with a bunch of them pinned together for assembly work. I tend to just expose the one or two parts I need and dump them out into the board I’m working on. I’m an electronic slob. I do most of my work under an Olympus SZ40 binocular microscope setup for soldering.
So, nothing major and I could have used any one of the designs available for download but I wanted to tinker with the design and print a bunch of similar but different cartridges that work for me.
Sorry…flow of consciousness.
Have you checked out Stephen Hawes on YouTube? Or maybe the OpenPnP project?
Regardless, this is awesome. I moved away from doing by-hand soldering on prototypes, as places like JLCPCB and PCBWAY have services which are just so stupid cheap now that I can’t really pass them up.
I know OpenPnP. We have talked about it but most of the work I do is very small run. I hand solder everything down to 0402s and TQFPs with 0.4 mm pitch in one to three or four units. I’ve considered buying a hand PnP unit and I may at some point. I just upgraded to a new Hakko dual head soldering station which makes hand soldering stupid easy. I’ve probably got a few years of hand soldering in me.
Most of what I do is repairs and rework with a fair amount of prototyping.
For any production runs the guys I work with have PCBWAY do the populating for them.
Ah, I haven’t had to do SMD repair in a long time so it totally flew over my head. Those tweezer soldering irons are gooooood stuff. So much faster to remove tiny little caps and resistors.
Tweezers are the bomb. I’ve been doing a lot of repairs to old gaming consoles and hand helds. That actually paid for the new soldering station. Removing the surface mount caps without tweezers is possible but not easy.
🔥

